How to Build Your Own DIY Pickleball Machine
Learn how to create a DIY pickleball machine with this easy step-by-step guide, saving you money and enhancing your practice sessions.
Ever wished you had an extra set of hands for that intense pickleball practice? Say hello to the DIY Pickleball Machine - your secret weapon for mastering those pickleball shots without enlisting the help of your poor, overworked spouse or best friend!
Have you ever found yourself in the middle of a heated pickleball match, giving it your all, and suddenly realizing that your trusty partner's shoulder might just give in to the relentless serving? Or maybe you're just tired of sending your ball-retrieving dog on a never-ending cardio quest to fetch your errant shots. Well, fear not, because, in this article, we're about to delve into the fantastic world of the DIY Pickleball Machine.
Pickleball machines aren't just for the pros; they're the key to sharpening your skills, perfecting those impressive shots, and unleashing your inner pickleball maestro.
Instead of shelling out a fortune on a fancy commercial machine, we're about to explore how you can build your very own pickleball-serving marvel. That's right, folks, with a dash of creativity, a sprinkle of innovation, and a side of good old-fashioned DIY spirit, you can have your very own pickleball machine up and running.
In this article, we'll show you why a DIY pickleball machine is the game-changer you didn't know you needed. We'll walk you through the ins and outs of creating one, and we promise it's easier than perfecting that backhand slice. So, get ready to ace your pickleball game and become the envy of your fellow players. Stick around, and let's embark on this DIY pickleball machine adventure!
Materials and Tools
- Used Tennis Ball Machine: The heart of your DIY pickleball machine is a used tennis ball machine. You can often find these at affordable prices online or at sports equipment stores. It's your starting point, and you can think of it as the "head" of your mechanical teammate.
- Pickleball Conversion Kit: To modify your tennis ball machine into a pickleball-serving wizard, you'll need a pickleball conversion kit. This kit includes the necessary components to adapt your machine to pickleball-sized balls. It's like giving your machine a pickleball makeover.
- Pickleballs: You need enough pickleballs for your practice sessions and a few extra for those inevitable shots that go out of bounds.
- Power Source: Depending on the type of tennis ball machine you acquire, you may need an adequate power source. Most machines can run on standard electricity or rechargeable batteries, so make sure you have the right setup for your chosen machine.
Tools
- Screwdrivers: Different parts of your tennis ball machine may need to be disassembled, modified, or adjusted. So, various screwdrivers will be your trusty companions in this process.
- Wrenches: You might need wrenches to tighten or loosen bolts and nuts, ensuring a secure setup for your pickleball-serving marvel.
- Allen Keys (Hex Keys): Some components may require an Allen key for precise adjustments, so keep a set of these handy.
- Safety Gear: Safety first! Gloves and safety glasses are a good idea, especially when handling tools and modifying the machine.
- Imagination and Patience: These may not be traditional tools, but they're equally important. Your DIY pickleball machine adventure will require a touch of creativity and a heap of patience. Embrace the learning process, and don't be afraid to think outside the box.
Materials
You can use any type of wood for your DIY pickleball machine, but we recommend using plywood.
Wood Sheets: First, acquire sturdy plywood or wooden sheets. These will be the canvas for your creation.
- Circular Saw or Jigsaw: You'll require a circular saw or jigsaw for precision cuts. They're like your artistic paintbrushes, helping you sculpt the perfect shape.
- Measuring Tape and Pencil: These tools are your best friends for marking the measurements on the wood sheets, ensuring your cuts are accurate.
- Safety Gear: Safety goggles and ear protection are essential when working with power tools. Protect yourself like a pickleball player guarding the net.
Wood Cutting Steps
Don your safety gear – goggles and ear protection, just like pickleball players gear up with paddles and shoes. Safety is your top priority. Take the measurements from your machine and transfer them to the wood sheets. Then, using a pencil and measuring tape, mark the cutting lines.
Before diving in, take a moment to sketch out the design and measurements of the parts you need. Think of it as creating a blueprint for your pickleball machine's frame.
- Measure Twice, Cut Once: Using your measuring tape and pencil, mark the dimensions of each piece on the wood sheets. Remember the old carpenter's saying: "Measure twice, cut once." Precision matters here!
- Cut with Care: With your circular saw or jigsaw, start cutting along the marked lines. Take your time and follow the lines closely to achieve clean, straight cuts. It's akin to executing a precise pickleball serve.
- Repeat as Needed: Depending on your design, you may need multiple pieces. Repeat the process for each one. Your pickleball machine's frame is coming together!
- Test the Fit: After cutting, check how well the pieces fit together. Think of it as assembling the puzzle pieces of your creation. Make any adjustments as needed.
Assemble Your Machine Frame
- Wooden Pieces: Those carefully cut wooden pieces from the previous step are now your main ingredients.
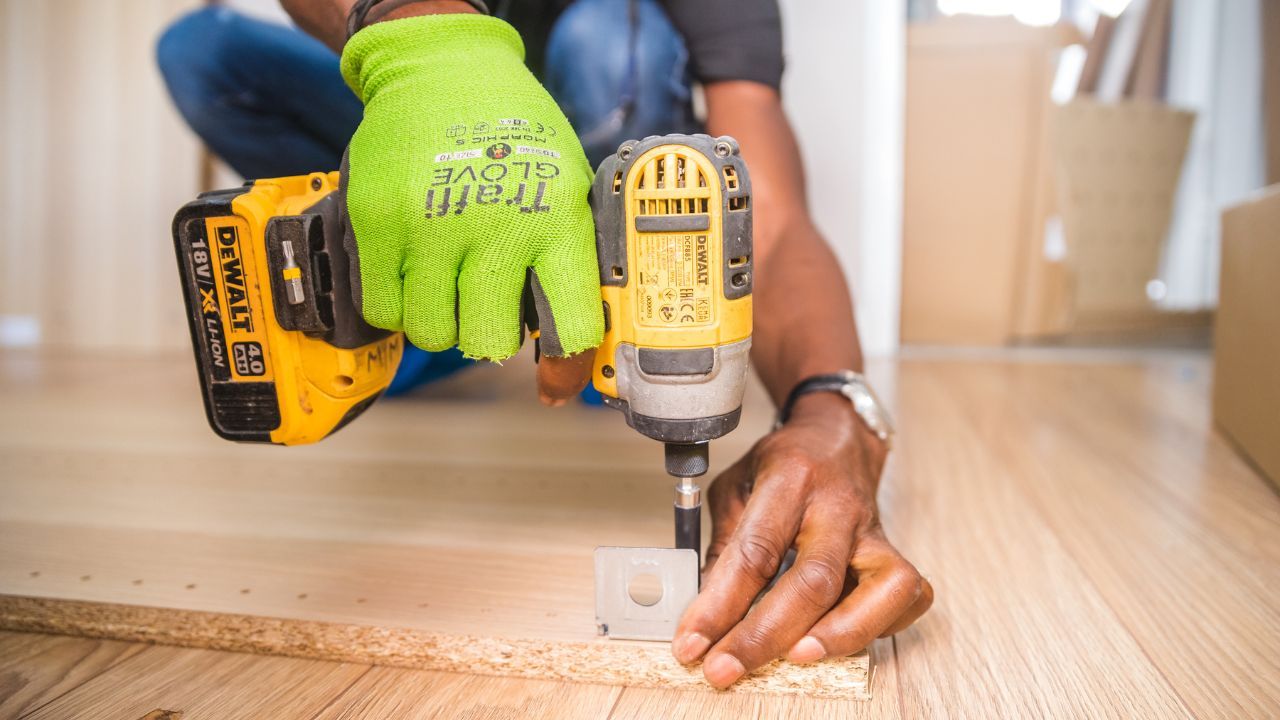
- Screws and Screwdriver: To hold the wooden parts together, you'll need screws and a screwdriver. Consider them your machine's backbone – keeping it strong and sturdy.
- L-Brackets: These brackets will provide extra stability and ensure your frame is as solid as a well-placed dink shot.
Steps To Assemble Your Machine Frame
Start by laying out all the wooden pieces on a flat surface. Think of it as setting up your pickleball court – the foundation for all the action.
- Plan Your Assembly: Consider the design you envisioned when cutting the pieces. Typically, the frame will consist of a base, sides, and top. Ensure that everything lines up correctly.
- Secure the Base: Begin by attaching the sides to the base piece. Use screws to hold them together. It's like building the walls of a pickleball fortress.
- Top it Off: Place the top piece onto the frame, and secure it with screws as well. This will give your machine the stability it needs to withstand the fast-paced action.
- Reinforce with L-Brackets: For extra durability and to ensure your frame can handle the pressure, use L-brackets at the corners and joints. They're like the reinforcement bands of your pickleball machine.
- Double-Check: After assembling, give your frame a little shake. If everything is solid and doesn't wobble, you've done an excellent job. Think of this step as ensuring your machine's readiness for the pickleball court.
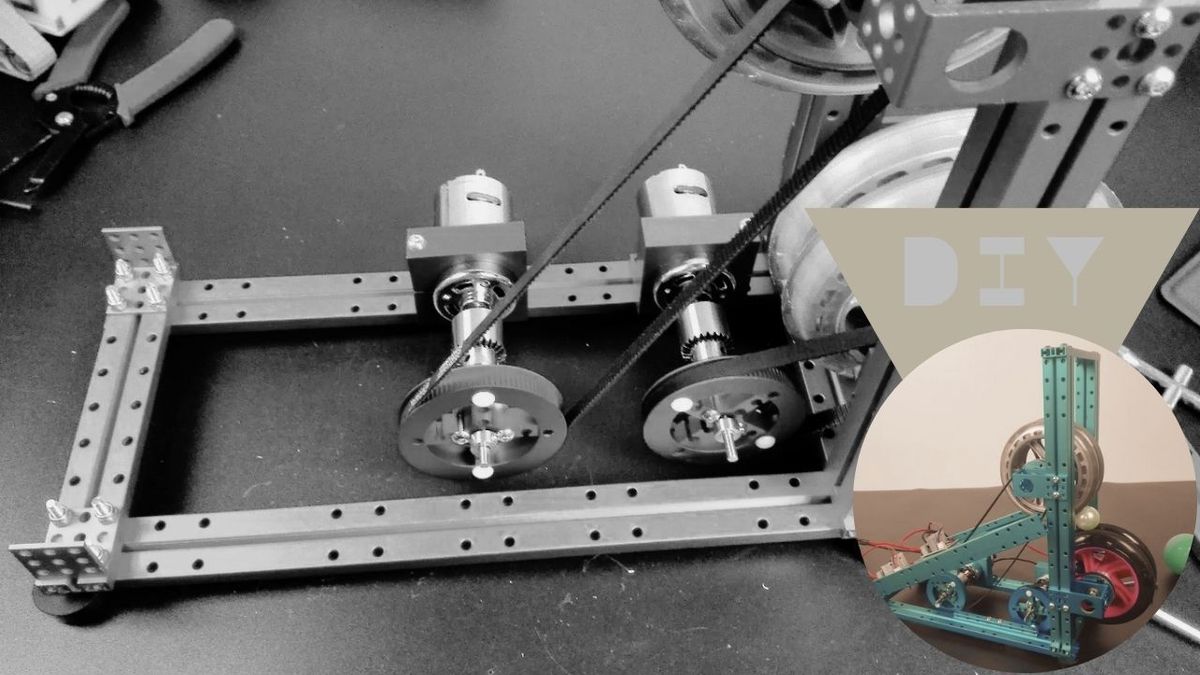
Add Motor & Battery Holder With Switch
- Electric Motor: This is the powerhouse that will drive the pickleball-feeding mechanism. It's like the engine of a race car, propelling your machine to action.
- Battery Holder: To provide energy to the motor, you'll need a suitable battery holder. It's like your machine's fuel tank, ensuring it's always ready to serve.
- Power Switch: A simple on/off switch is the key to controlling your machine's serving action. It's your machine's control panel, much like how a pickleball player controls their shots.
- Wires and Connectors: To link everything together, you'll need wires and connectors. Think of these as the neural pathways that transmit signals to make things happen.
- Screwdriver: Your trusty screwdriver will be needed again for securing the motor and switch in place.
- Screws: Make sure you have the appropriate screws to attach the motor and battery holder to the wooden frame.
Continue
Position the electric motor on your frame. This is where the pickleball-feeding magic happens. Secure it in place using screws.
- Attach the Battery Holder: Find a suitable spot on your frame for the battery holder. It's best to place it near the motor. Attach it securely to the frame with screws.
- Wire the Components: Connect the motor to the battery holder using wires and connectors. Ensure the wiring is secure and well-insulated.
- Install the Power Switch: Mount the power switch in a convenient and easily accessible location on the frame. Connect it to the wires that link the motor and battery holder. This is your machine's control center, like a pickleball player ready to serve up some action!
- Secure Everything: Double-check that all components are firmly secured to the frame. You don't want anything wobbling when your machine gets into the groove.
- Test the System: Before proceeding, test your machine's new power system. Flip the switch and ensure the motor spins correctly. It's like the final pre-match warm-up to make sure everything's in top form.
Paint & Stain Your Machine
This is the fun part. You can paint your machine any color you fancy to give it a personal touch. Choose your favorite colors or those that match your pickleball court. The paint is your palette, and you're the artist.
- Paintbrushes: Select various brushes to create different effects, whether it's smooth strokes or playful splatters.
- Stain (Optional): If you prefer the natural look of wood, you can opt for a wood stain to enhance the grain. It's like giving your machine a touch of elegance.
- Sandpaper: To prepare the wood surface for painting or staining, you'll need sandpaper. Think of it as the canvas prep before your masterpiece.
- Tarp or Drop Cloth: To protect your workspace and prevent paint or stains from reaching unintended places, lay down a tarp or drop cloth.
If you're painting, ensure the wood surface is clean and smooth. Sand away any rough spots or imperfections. Select the colors that resonate with your pickleball spirit. Whether it's a classic green or a wild neon, the choice is yours.
- Apply Primer (If Needed): If you're working with bare wood and want the paint to adhere better, a coat of primer can be helpful.
- Paint with Precision: Start with broad strokes and work your way to the details. Paint each component of the machine one by one. Feel like a pickleball Picasso!
- Staining (Optional): If you're staining, apply the stain in the direction of the wood grain. This brings out the natural beauty of the wood.
- Let it Dry: Be patient as the paint or stain dries. It's like waiting for a perfect moment to unleash your drop shot.
- Additional Coats: Depending on your desired finish, you may need multiple coats. Let each coat dry thoroughly before applying the next.
- Touch-Ups: After the paint or stain dries, you can make touch-ups to ensure a clean and polished look.
Done!
Congratulations! You've reached the grand finale of your DIY pickleball machine journey. You've assembled, powered up, and added your unique style to your creation. It's an exciting moment, akin to stepping onto the pickleball court ready to showcase your skills.
With your DIY pickleball machine ready, you're now armed with the ultimate practice partner and a fantastic conversation starter on the court. As you fine-tune your pickleball prowess and amaze your fellow players, your machine will stand as a testament to your dedication and ingenuity.
Key Takeaways!
The journey of creating your DIY pickleball machine is a testament to ingenuity and passion. Whether you're on a budget, crave customization, or relish the satisfaction of building your training partner from scratch, your homemade marvel is now ready to elevate your game. So, go ahead, serve up aces, perfect your dinks, and enjoy the thrill of pickleball, knowing that you've not only honed your skills but also crafted a unique companion for your court adventures.
Pickleball Articles Worth Reading!
- Game On the Go: Unleash the Fun with a Portable Pickleball Net!
- 10 Pickleball Rules You Need to Know to Dominate the Court Like a Pro!
- 4 Must-Have Pickleball Paddles That'll Up Your Game in No Time!
- Game On: Unveiling Pickleball Set That Will Revolutionize Your Playtime!
- Demystifying the Magic of Pickleball Paddle Grips
- Ideas That'll Upgrade Your Home Office Comfort
- Unleash Your Game With The Perfect Pickleball Shoes for Men